- Contents
- Index
- Search

Show results that include all search words
The Calc Tab
If you cannot see the Code Toolbox in the lower right, go to the View menu and select Toolbox.
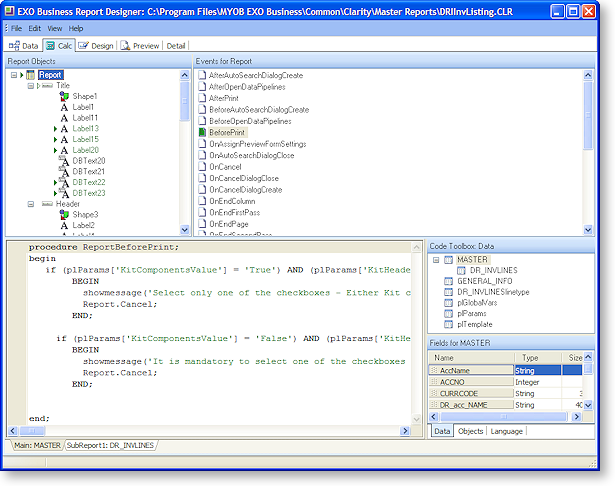
Tree View
The upper left window pane has three modes to determine what kind of data you can see, both in this pane and the Event Pane (2). To select the view mode, right click in Pane 1 or chose one of the following options from the View menu:
-
Variables – When this option is selected, the visible report bands are listed in the Tree View and any variable components that are currently in those bands are shown in the Events Pane. This gives you the ability to quickly change multiple variables' calculation code.
-
Events – This is the default Calcs view, and it shows a tree view of all the components of the report. You can then select any component to show the events that are triggered in relation to that component in the Events Pane (2). This is the mode that we will work in mostly for the remainder of this document.
-
Module – The module view is very powerful, in that it shows all the current code that has been entered against events or calculations in the report. You can edit code from here, but you cannot add code against a new event, you need to go to the Events view for this. The tree view here shows four items of interest:
-
-
Declarations is where we declare any “global variables” or constants. Declaring a variable or constant here will ensure that we will be able to access it from any of our functions or procedures.
-
Events lists only two events in the Events pane, OnCreate and OnDestroy. OnCreate is triggered as soon as the report is run, and OnDestroy is triggered as soon as the report is closed (or finishes printing if there's no user input).
-
Programs is an area where you can write your own code, either as a function (which returns a value) or as a procedure (which does not return anything). Using custom procedures means that you can write a procedure once and call it as many times as you like throughout your report. It has the benefit that if you ever need to update your procedure, you only update the one piece of code, not all the different variations of the same thing scattered throughout the report.
-
Event Handlers lists all the currently populated event handlers in the Events pane. While you can modify existing ones from here, you cannot create a new handler from here. You need to go into the Events mode to do this (see above).
-
Events Pane
This is a list of all the events belonging to the selected item in the Tree View pane (1). Events without an event handler show as a white icon in the Events pane. A green icon means that there is a valid event handler, and a red icon means that there is a problem interpreting the code in the event handler.
The two event handlers that we will use the most are “OnCalc” and “OnGetText”. You will note that different events appear when you click on a DBCalc field, Variable field and label field. Our calculations will mostly use Variables. We will usually use the “OnCalc” statement when we are performing a calculation and the “OnGetText” field when we are manipulating text fields.
Code Pane
This is where we write the code (event handler) that will be executed on the selected event. To begin writing code, click on an event in the Events pane and then click in the code writing pane. A skeleton procedure will be displayed for you to complete.
Code Toolbox
The Code Toolbox has three tabs: Data, Objects and Language. Any items listed in the bottom pane of any of the three tabs is able to be clicked on and dragged onto the code writing area to form part of your code (this just saves typing time).
Data Tab
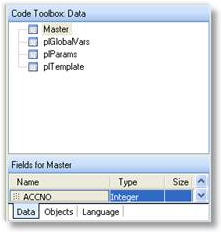
The top pane lists our available data sources. As you click on a data source the fields available in that data source appear below.
Objects Tab
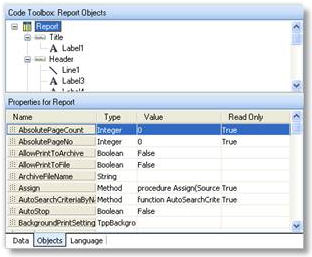
The top pane shows a tree view of the report, similar to what you see in other areas of Clarity. When you click on a report object the properties belonging to that object appear in the bottom pane. You are able to use these values in your code, either reading from them or changing them, if it is not a “Read Only” property.
Language Tab
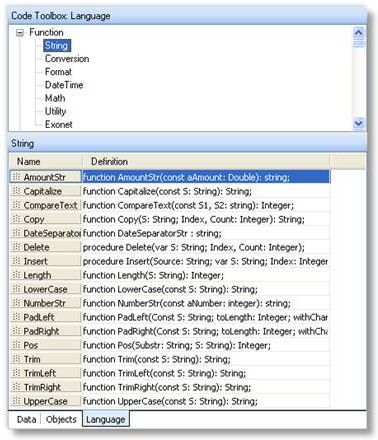
The language tab contains templates for the many functions and values that are available for use within Clarity. These functions and values are separated into different areas and you click on the area you require in the top pane to reveal the list of function templates / values that are available.
For exampl, to set all letters of a string to lowercase, click on the String item in the upper pane and then drag the LowerCase item from the lower pane onto the code area.

You can usually tell from the definition column how to use each function. In the example above you need to enter the string to convert in between the brackets and that the function will return a string.
Example:
Text := LowerCase ('THIS is my String');
Would result in the Text property becoming:
this is my string